×V5.3Ø
S |
A |
W |
WS |
M |
|
|
|
|
|
Command Builder
The Command Builder is a tool that is built into EMUE that allows you to identify an element in a web browser. The tool will automatically build a valid command for that element.
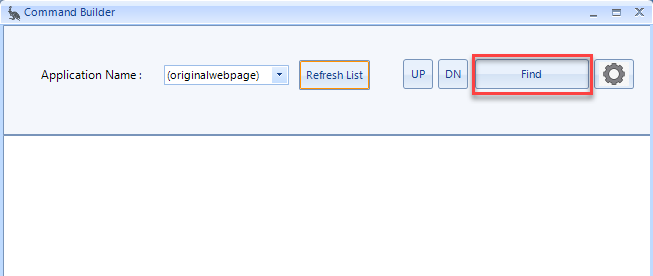
Once a website has been opened using the OpenWebPage command, if the debugger is enabled, the Command Builder can be opened from the Tools menu.

Once you click the 'Find' button, you can identify elements in an application simply by hovering over the elements you wish to interact with and pressing the trigger combination. This can be configured by clicking the settings button to the right. If no activity is detected the 'Find' button will turn off after 30 seconds.
Hovering Over Elements
Once the 'Find' button has been clicked, EMUE starts to recognize the elements you hover over in the application. As you hover over an element, press the trigger combination on the desired control. EMUE will record that element in the white space below the buttons. Make sure the command builder is referencing the desired application in the 'Application Name' dropdown if you are working with multiple web browsers.
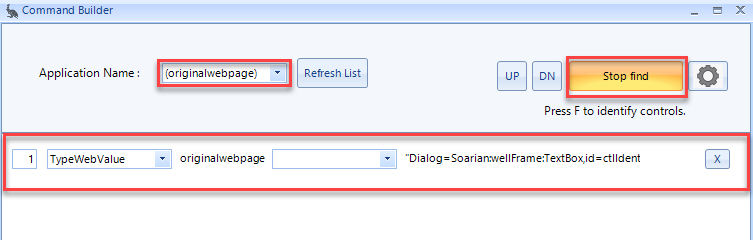
Once an element is identified in the application, it will be highlighted by to inform the user which element has been selected.
Selecting an Element Type
After selecting the 'Find' button and identifying a specific element using the trigger combination, you might encounter a pop up menu with multiple element options. When this occurs select which element you would like to interact with. These will appear for elements such as grid/cell/element and table/tablerow/tablecell/divsection fields. The main purpose of this pop up menu is to lock on a specific element type, so you can interact with the application differently depending on your selected element.. For example, rather than retrieving an entire grid from an application and bringing the list into EMUE, you might want to interact with a single row item.

Selecting Multiple Elements in Sequence
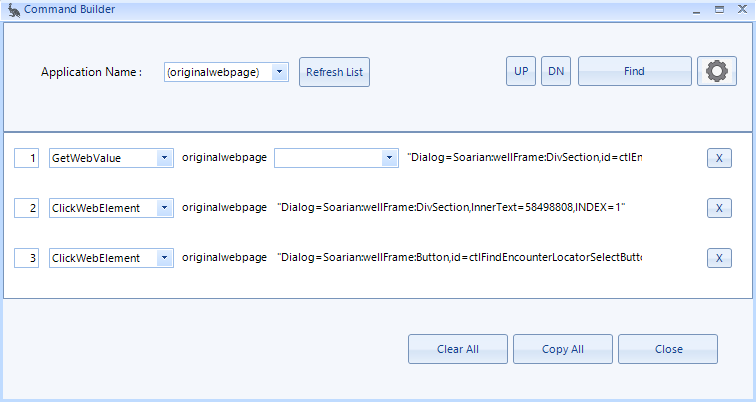
In the command builder, once you press the 'Find' button you may continue to identify as many elements on the screen as needed by placing your mouse over them and pressing the trigger combination. For example, below the user has selected a grid, a gridcell, and a button. When you are finished, click 'Stop find' on the command builder. From here the user may make different decisions depending on what they would like pasted within their script.
Building a Command
Once you have hovered over an element and it appears in the command builder window, there are dropdown menus to select specific commands and parameters based on the selected element.
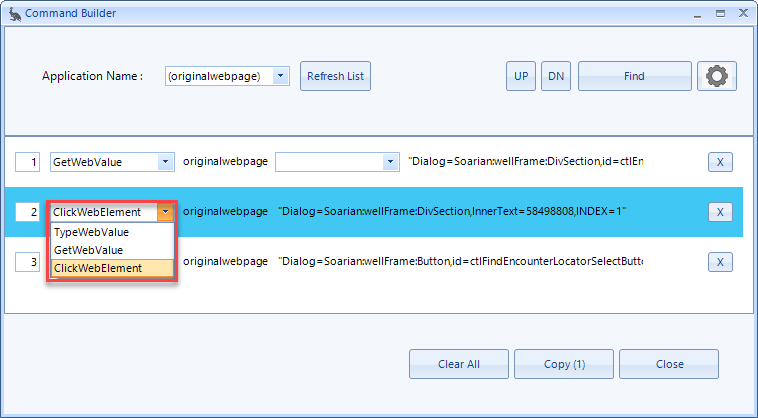
In the image above, the first dropdown menu determines which command you would like to use for a specific element and EMUE infers a command based on the element type selected. For example, if you select a DivSection type field, then EMUE assumes you would like to click on the DivSection and places a ClickWebElement command. However, youre welcome to change the command, if the desired command is not the default.
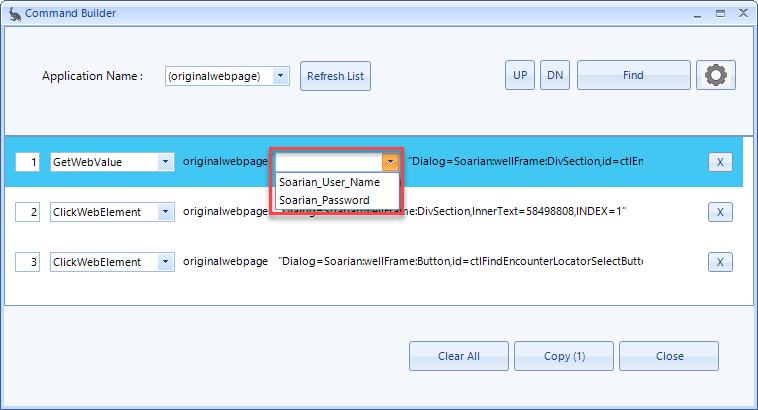
Dropdown menus will appear to the right of the command occasionally, which signifies an additional parameter is needed to complete the command, such as a variable or a list. You can also type in a value that isnt a variable or an already established list within the script, which results in a hard-coded string in the command or a new list name. For example, above there is a GetWebValue command for an DivSection element, and the parameter to the right is the specific variable name that will store the contents of the element in EMUE. These additional parameters change based on the command selected. For example, above, the user has also selected a ClickWebElement command for a button type and there is not a parameter to the right of the command like there is for the GetWebValue command because a button doesnt need information typed into it or a list generated from it. A button can simply be clicked.
Anchoring and Using the Edit Element Window
When a command is selected from the list of commands, a pop-up dialog appears to find the appropriate anchor for the selected element, this is not always necessary. However, in situations where an element does not have a good identifier and the command will not interact as expected with an element, then EMUE will use the elements around the selected element to uniquely identify and interact with the selected element as expected. The biggest takeaway for anchoring is that it requires flexibility not every element will interact as expected and you might need to problem solve and try multiple scenarios to make the best decision for your script.

1. Parameters: The first section in the Edit Element Window includes the parameters for the selected element such as the AttributeName, Type, and Index. The user may select which parameters they would like to include. TYPE and INDEX are required parameters, but it is recommended that all parameters be used if theyre available.
2. Add Reference Button: To add a reference or anchor, you will then click the Add button to search the application page for an element that is to the left, right, above, or below the current selected element. Afterwards, the current element info section will change to reflect the new element string with an element string reference. Users can select which kind of reference it should be.
3. Reference Type: In the Edit Element Window below the parameters there is the reference type selection where you can choose from Position, Parent, and ContainsById reference types.
Standard: The standard reference is the simplest form and is the default element string.
Position: The position reference is the most used. In a position reference, the user can choose an element that is directionally around the selected element (left, right, above, or below). If the standard element and the parent element do not have a unique attribute, then the user can select to use a position reference. If you decide to select the position reference, you will need to click the "Add" button and identify other elements, such as a label, around the current selected element button.
Parent: The parent reference is used to return the parent of an element that has been identified. For example, a table may not have a reliable identifier, but it may have an element inside that is better to use. The user would reference the inner element and return the parent table.
ContainsById: The ContainsById reference is rarely used, but is designed to be the opposite of the parent. For example, if you can determine that the element appears inside of a Table, Span, or Div, you can identify that element first and then identify the element you actually want in relation to the container element (the Table, Span, or Div that contains your desired element).
4. Current Element Info: The 'Current Element Info' section displays the element string in its current state based on selections made by the user.
5. Reset and Close Button: The reset option will return the element to its original state before any anchoring occurred and the close button will close the Edit Element Window.
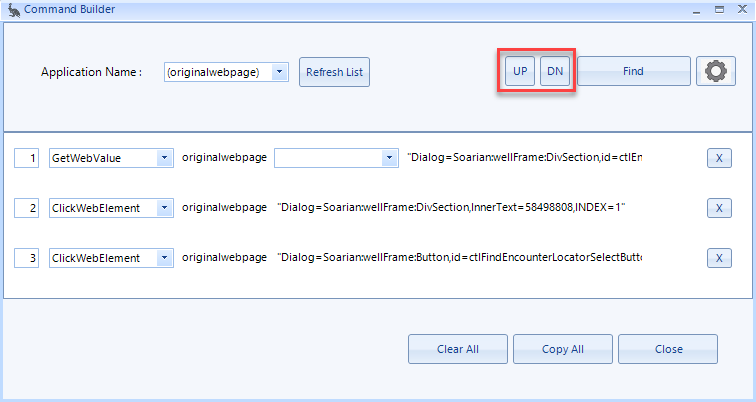
Up and Down Buttons
Depending on the interaction with the application, the user has the option to move each command line either up or down in the command builder to change the order of the commands.
Selecting a Row in the Command Builder
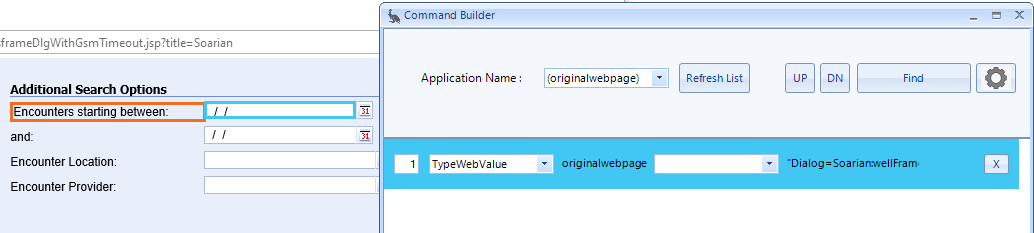
When a row is selected in the command builder, that element (Select button) will be outlined in blue in the web browser as long as that control is still visible.
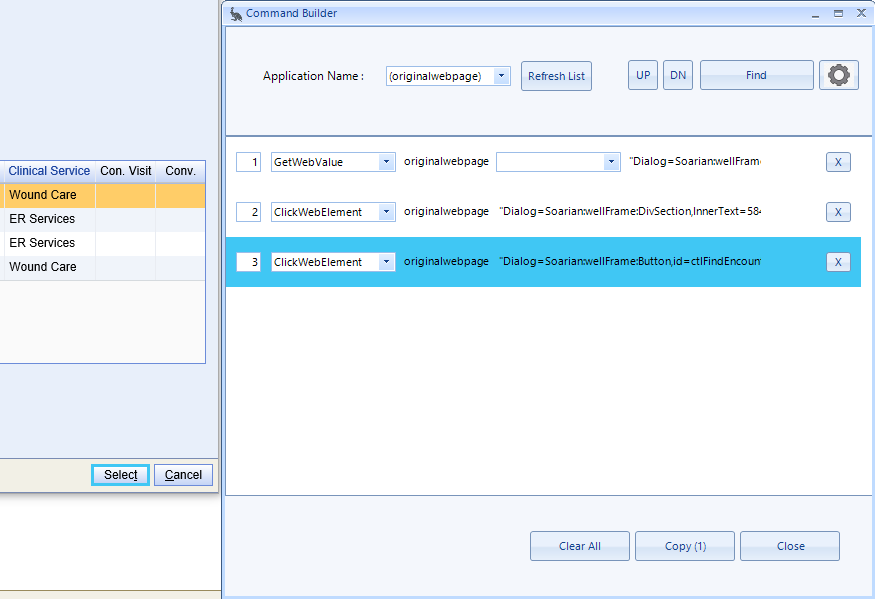
When a reference is used in the element string, the reference is in orange and the target element is blue.
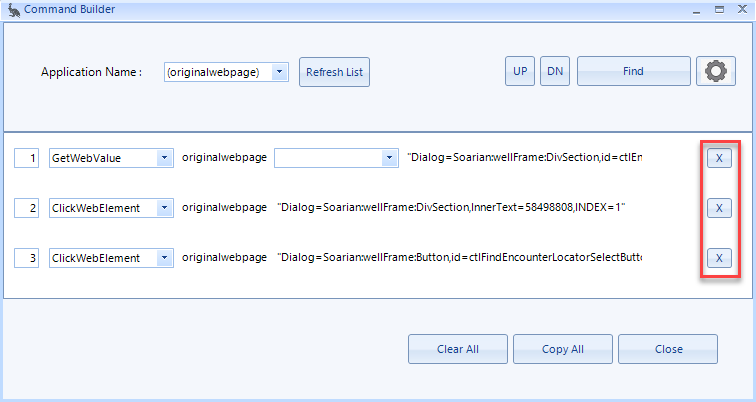
Deleting Commands
There is an option to delete commands from the command builder by clicking the "X" button to the right of each command.
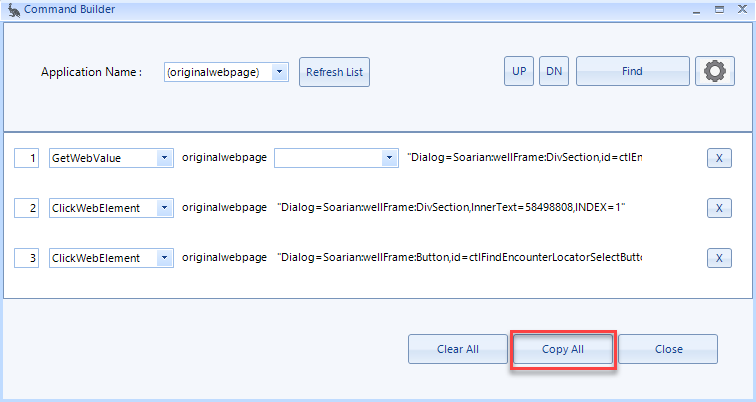
Copy All Commands
After selecting the command, formatting the commands and placement, and selecting the reference type, you have many options for copying the information into your scripts. One of the options is to select the Copy All button and copy each element and paste into their existing script. Once the button is selected, the copied elements will appear on the left hand-side of the Copy All button. This means the elements have been copied to the clipboard and are able to be pasted to the script.
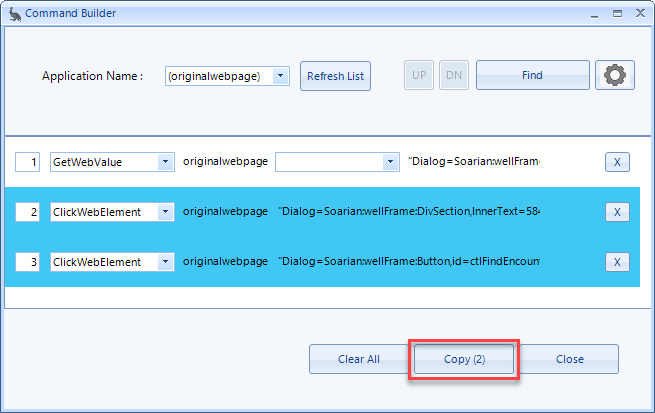
Copy One or More Rows
In addition to the Copy All button there is also the option to select one or more commands to copy and paste. Users can hold down the control key and select any number of rows to copy. Once, one or more commands is selected, the Copy All button will change to reflect Copy (the number of elements selected).
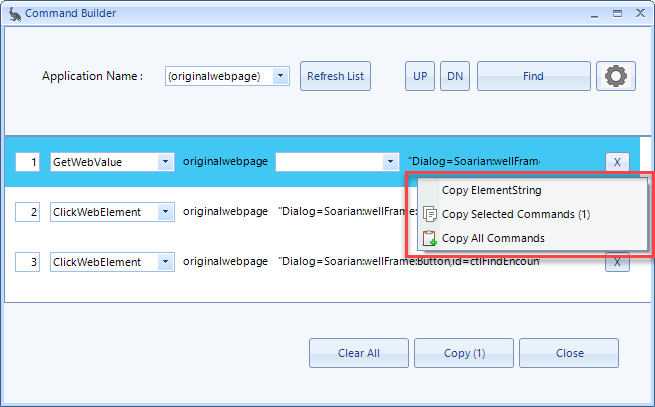
Context Menu
When one row is selected the user is presented with a menu to copy just the element string, copy the selected command or copy all commands. When there are multiple or no rows selected the user is allowed to copy all commands and/or copy selected commands.